
By now we have Anaconda up and running and we have created an environment.
My environment is called FXCMAPI and when I open the Anaconda prompt, I can switch to the new environment with the following command.
activate FXCMAPI

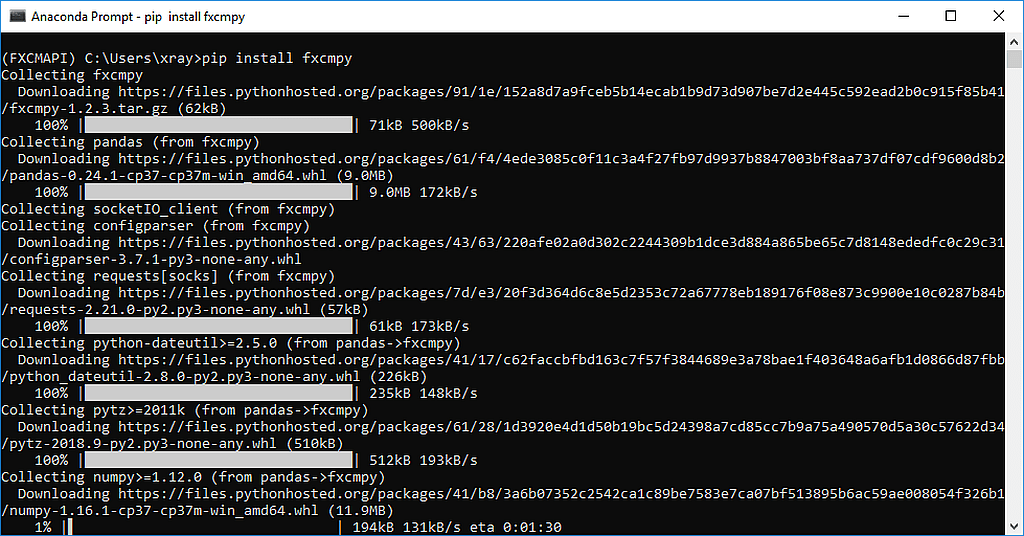
Now we need to use git to clone the repository. According to the documentation that should either work by using git clone https://github.com/fxcm/fxcmpy/ – but pip install fxcmpy should also do the job.
Indeed pip is starting the download for several files, it takes some time…
The FXCM documentation says that we should upgrade from time to time by using pip install fxcmpy –upgrade.
Once the installation is finished, we start a jupyter notebook in our FXCMAPI environment. That is done by using the following command.
jupyter notebook
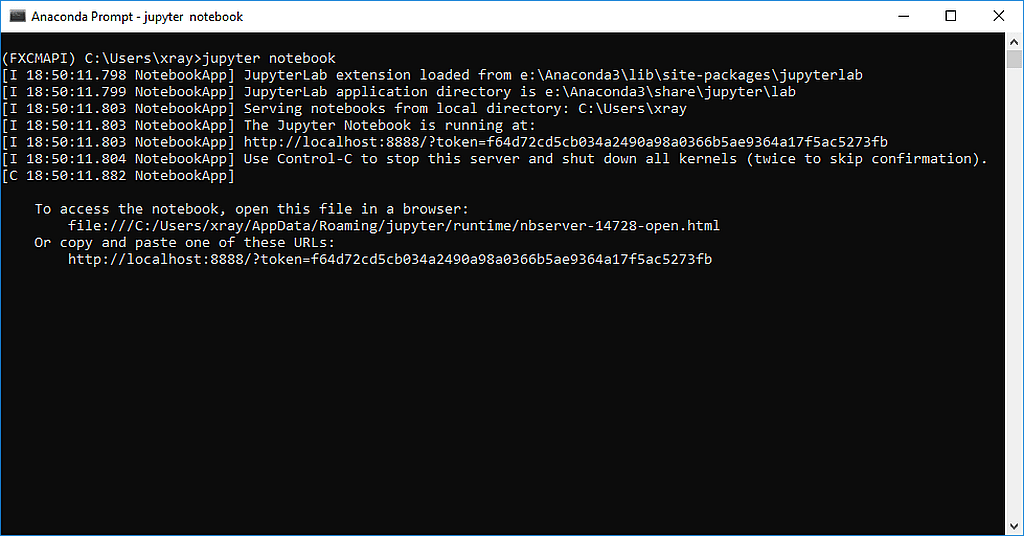
It takes a few more seconds, afterwards my brower comes up with a website for the jupyter notebooks. Today I learned that we need Firefox or Chrome, because jupyter notebooks will not work with Internet Explorer.
My browser window shows me the user folder file structure.

Now I click on NEW > Python3 to create a new notebook.
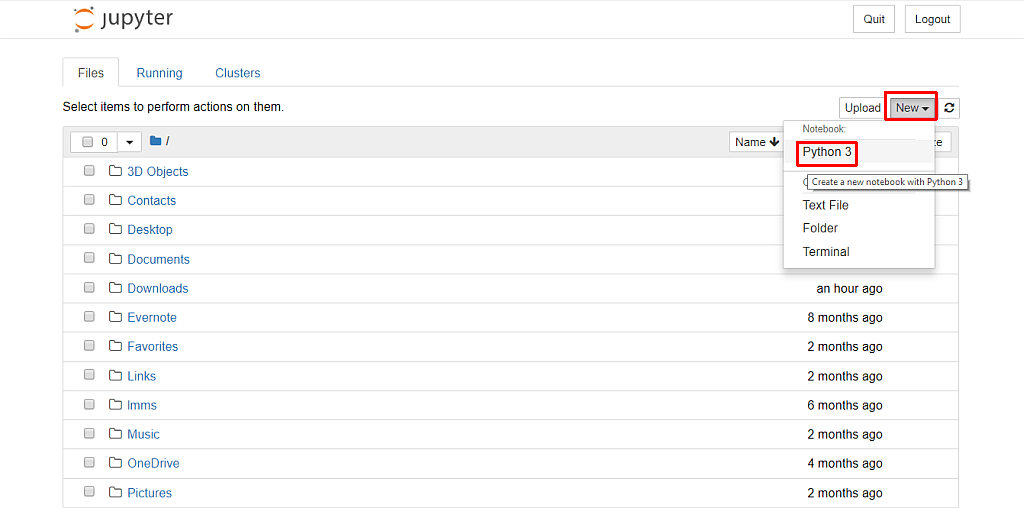
The new notebook will be also called FXCMAPI because I later want to understand what is inside of those notebook files.
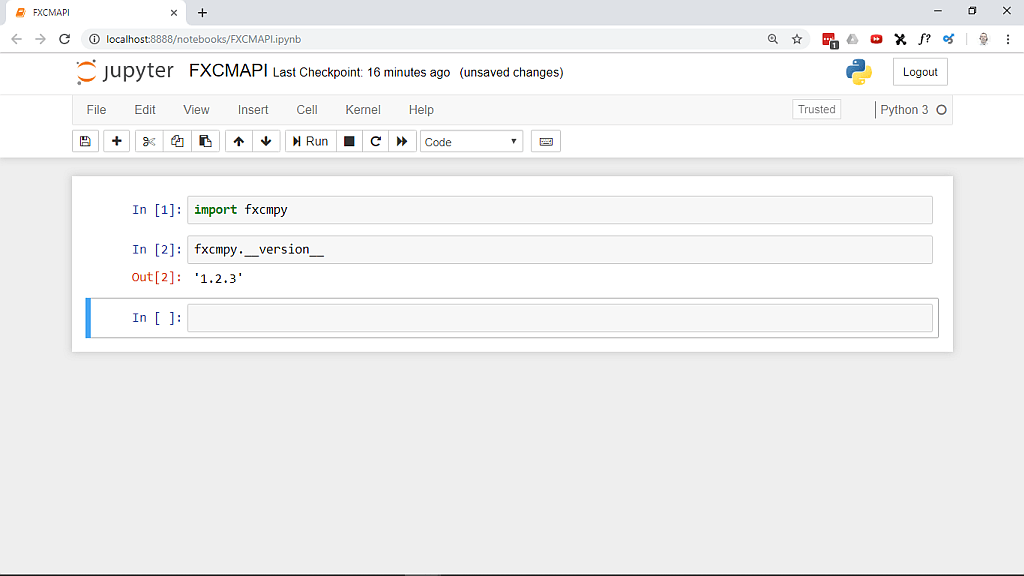
In the notebook we are going to import fxcmpy. But I get an error, saying that the module is not available.
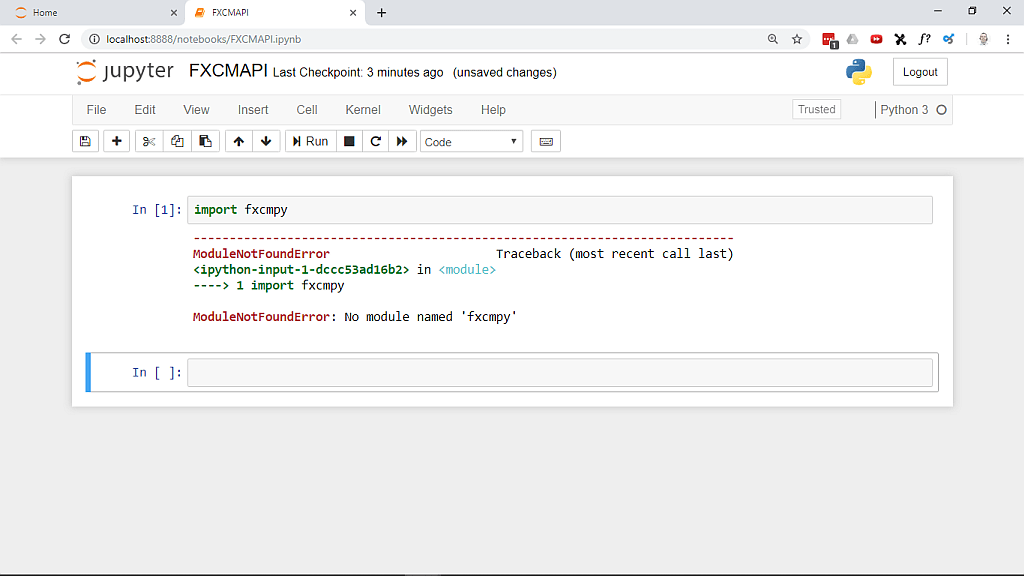
So let’s restart Anaconda navigator to fix that. The Anaconda navigator shows my new environment – but it seems that I need to install jupyter notebooks for that environment.
So let’s fix that and click on the install button after we have selected “Applications on FXCMAPI”.
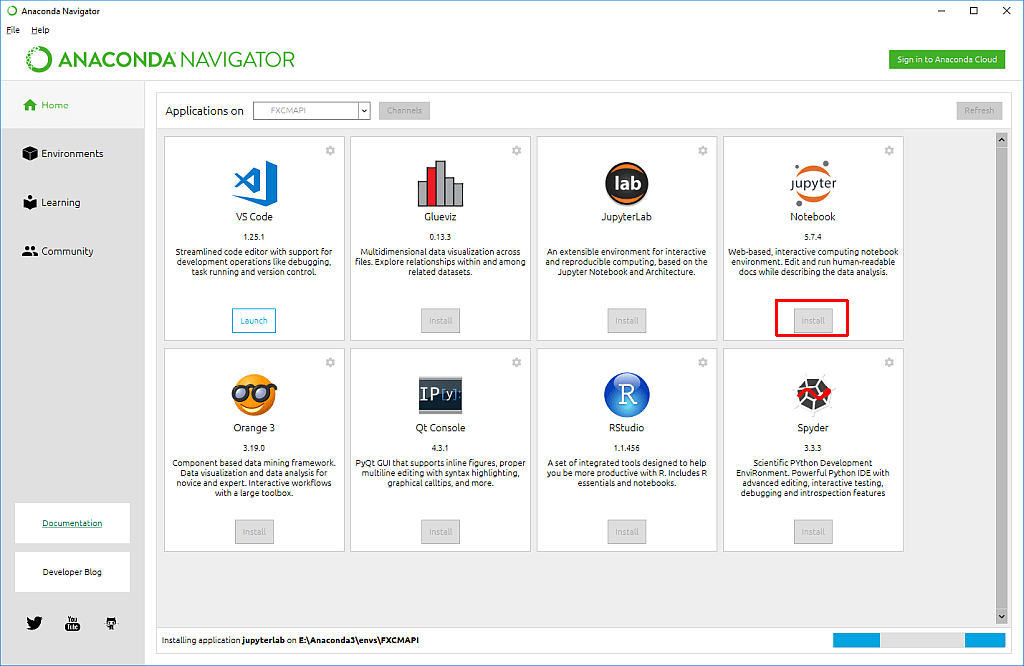
That took a little while and I restarted Anaconda afterwards. But when I selected the FXCMAPI notebook that we have created a few minutes ago, I was able to import fxcmpy without any errors. It also seems to work, because it shows me the installed version when I use the following command.
fxcmpy.__version__
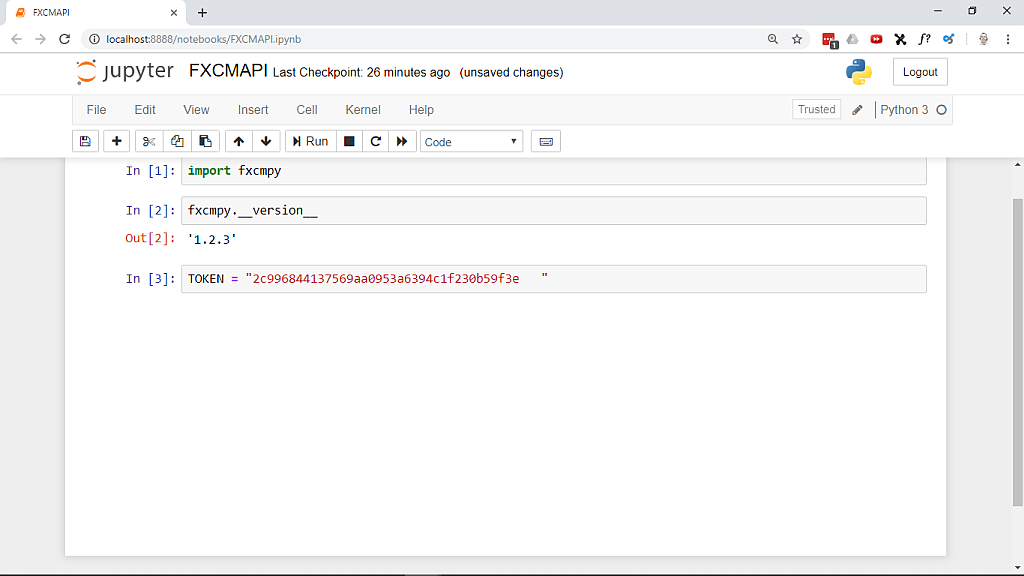
To connect I once again need that token, where was that thing again???
Okay, I found it so let’s create another cell in jupyter to define the token.
Once again I have left out a few characters as I am going to use the token for my own account.
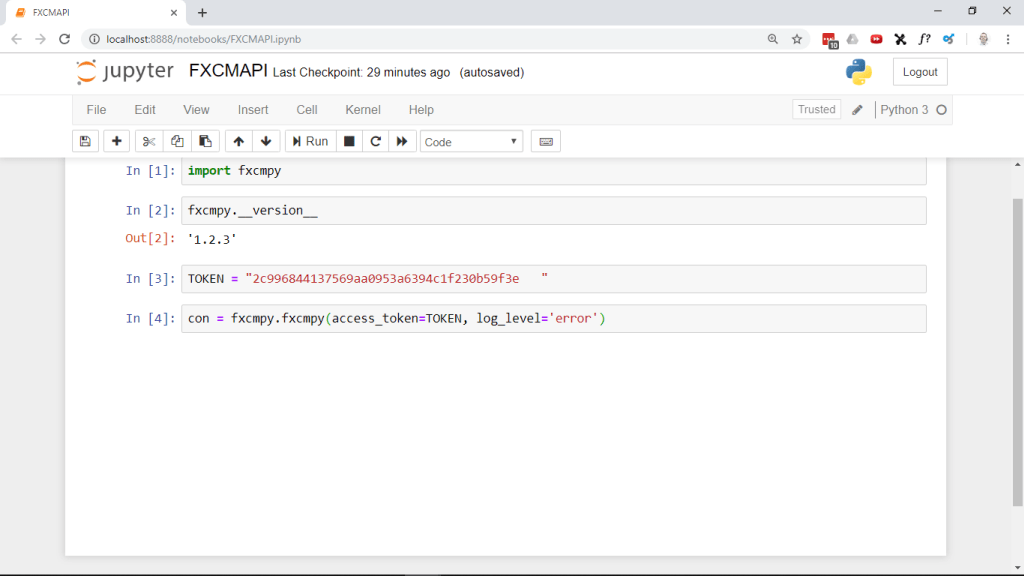
Now we can create a new connection by using the following command.
con = fxcmpy.fxcmpy(access_token=TOKEN, log_level=’error’)
No response, so far. So let’s find out if our connection is working. I will try to get the currency pairs by using the following command.
print(con.get_instruments())
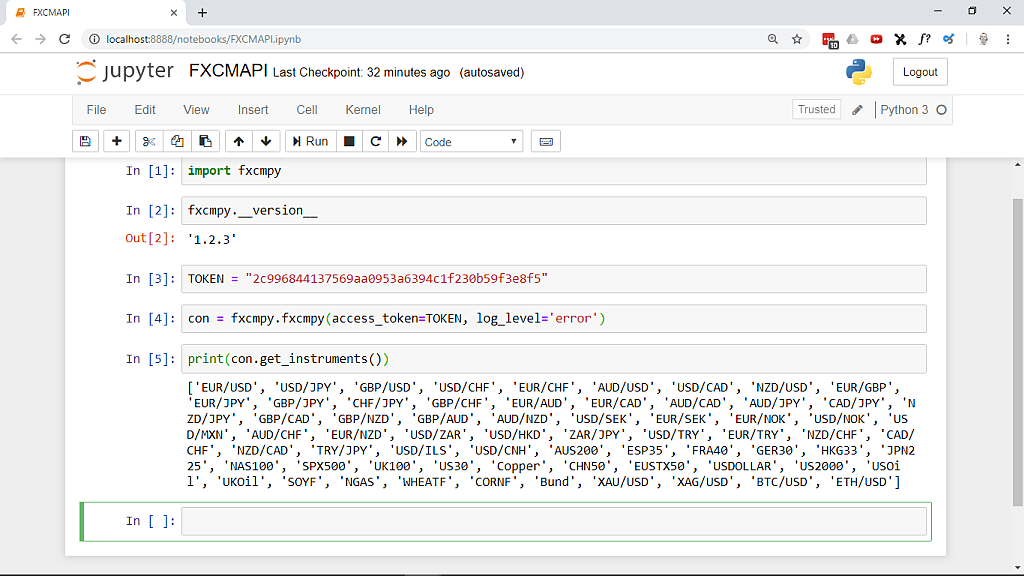
Okay, it looks like we have a working connection in our FXCMAPI environment for jupyter. That was not that hard. I really like it when progress is possible without so much hassle.
Actually I am starting to believe, that all this will be fun. FXCM suggests that we should use a configuration file to store the token in the current working directory to hide it from the user interface.
I think this is going to be the first thing for the next Python Trading video.
So far I am happy to see, that a lot of my favorite currency pairs are available.
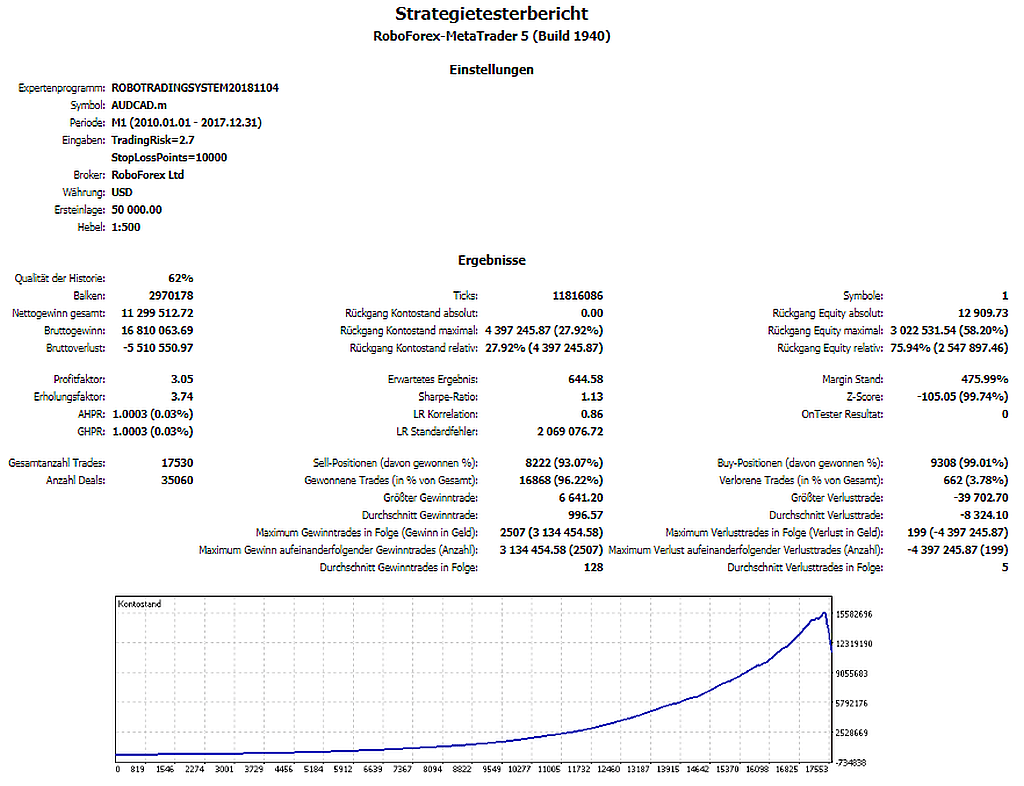
For my RobotTradingSystem that is written in MQL5 I really like to use AUD/CAD, because I was able to produce the following results in that currency pair.
I am curious if I can do that with Python, but I am starting to think that it is possible. If that is the case, I would be able to use automated systems on a lot of devices, because Python is available for almost every kind of operating system and processor.
For now I am happy that we could get the API connection to work with our new FXCMAPI environment in Anaconda.
In the next part we will deal with the API connection configuration and store the token in a file to hide it from the user interface.
This tutorial is about small steps, because for my MQL4 and MQL5 tutorials I often get questions about minor things that might cost a lot of time.
I have traded with automated systems since 2014, and often it takes a lot of time to find a small error that might cause a big problem.
I think we already made a big progress in almost no time…